Computer science is gaining strength in the technological world in which we live. Anyone who works with data needs to know about git. Git is a free and open source software that helps track changes to any set of files. Git is primarily used in team projects to coordinate the work between each team member to collaboratively develop source code during software or website development.
Computer science is gaining strength in the technological world in which we live. Anyone who works with data needs to know about git. Git is a free and open source software that helps track changes to any set of files. Git is primarily used in team projects to coordinate the work between each team member to collaboratively develop source code during software or website development.
In this tutorial, a very interesting topic that is widely used in industries where large amounts of data are handled will be learnt: git.
Imagine you want to start a project, for example, creating your own website. Since it is not easy, but heavy work, you decide to make a team to work faster and more efficiently, so that each team member will have a specific task. After each task was completed, it will be sent to each team member to be downloaded, and updated in each member's computer so that all will have the same work.
This seems managable, but what happens if the file is too big to be sent by email or you forgot to do a security backup and all yu work is lost after having made several new changes for improvement? Then, it becomes tedious to work this way.
But do not worry! There is a solution for this and it's called git. But...what is git? Git is a powerful tool used for source code management to handle projects efficiently. For example, if one of multiple team members make any improvement of the code, git allows the rest members to track these changes.
In this tutorial, how git is used in nepy project will be explained. Before we start, three things should be done. First, a GitHub account is needed. After having created the GitHub account, the second things to do is to create a repository. Then, the third thing to do is to create a personal access token PAT. More info about PAT can be found in the official site of Github (please go to Github Personal Access Token
After creating your repository, it will look like this:
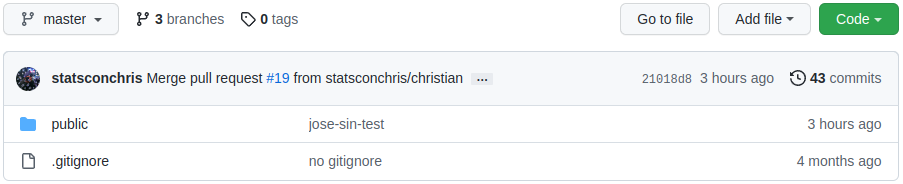
When working with git repositories, it is highly recommended to work with branches. A branch is a way to make changes to the source code without affecting the main part of the project. The default branch when creating a repository is called master or main, as seen in the figure above in the upper left corner.
Generally, each team member creates their own branch to make the corresponding changes in the source code. In the case of nepy, there are 3 branches: master, christian, jose, as shown in the following image.

Now, it is time to learn git. To start working with git, first it should be installed. To do so, open the Ubuntu Linux terminal (command line cmd in Windows) and type the following command:
sudo apt install git
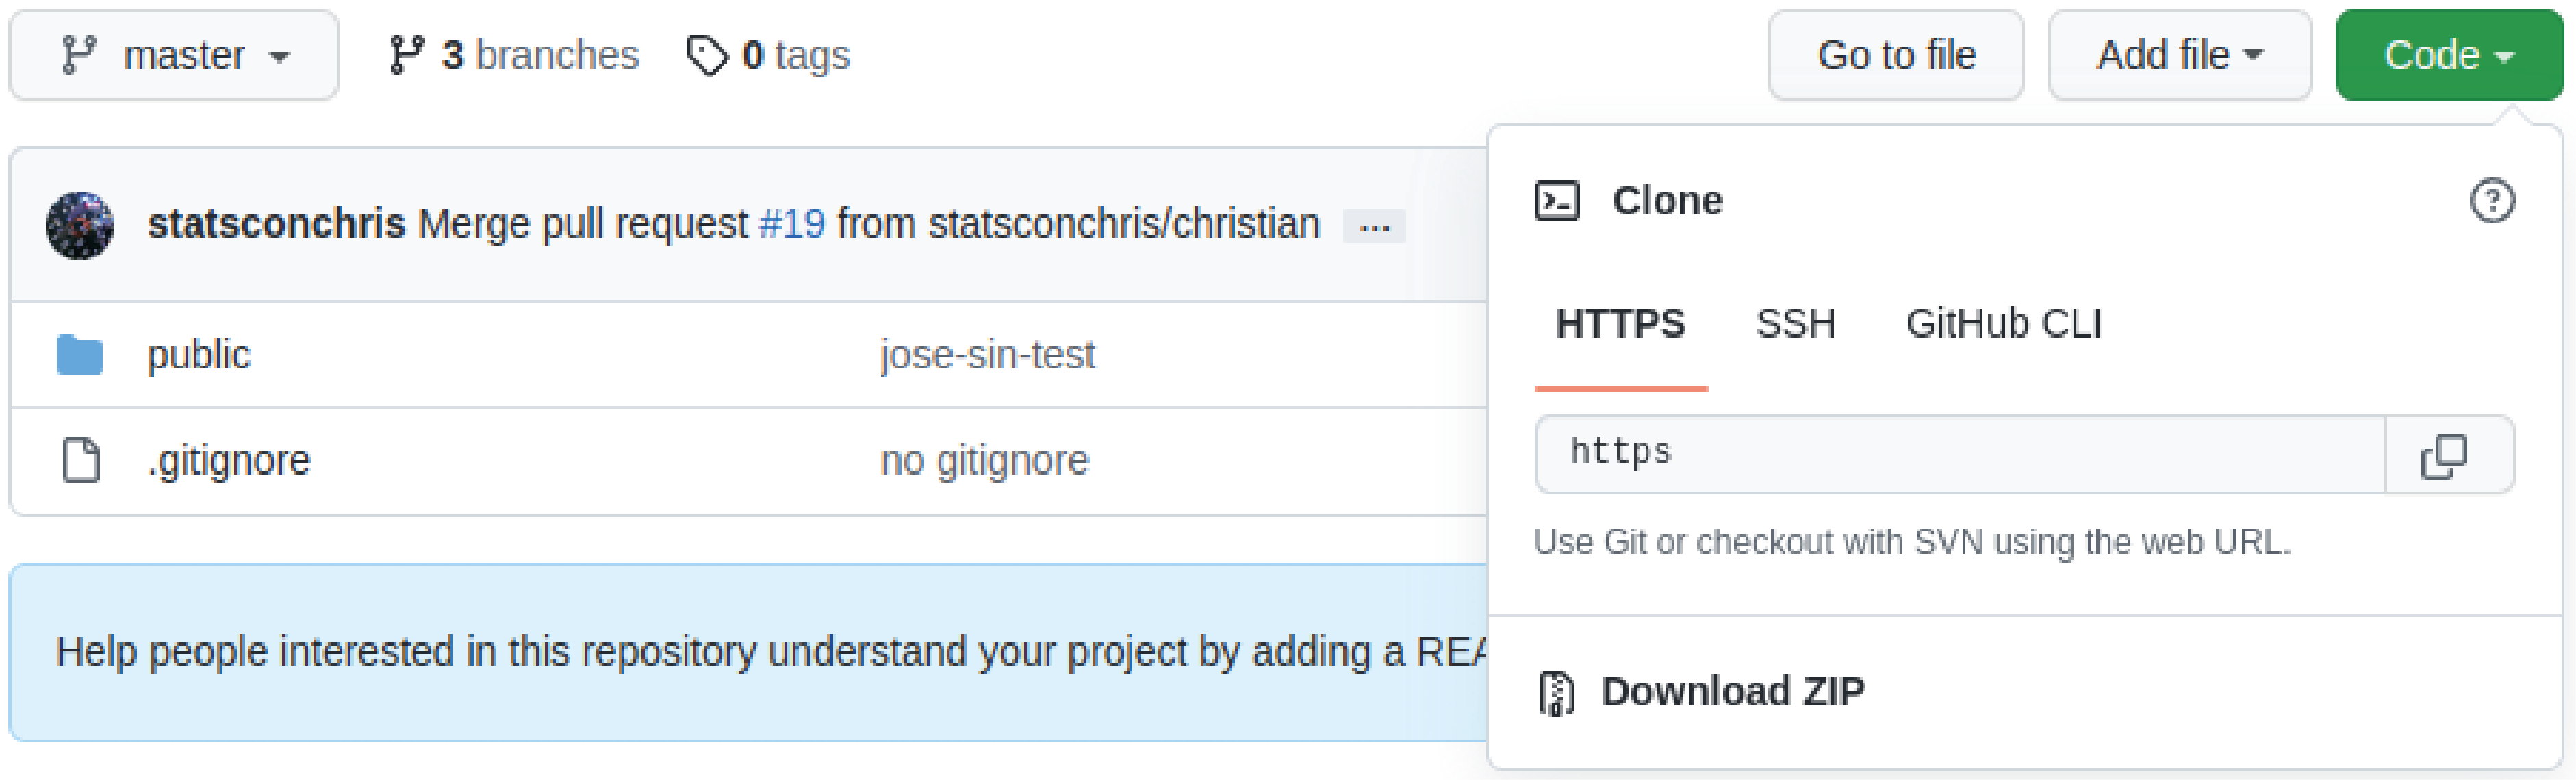
Once installed, let's learn how to clone a GitHub repository using the Ubuntu Linux terminal. Before typing the commands in the terminal, the html code must be copied from the GitHub repository. For this, in the upper right corner, click on code, as shown in the following figure
Once the link is copied, to clone the Github repository, open the Ubuntu Linux terminal and type the following commands:
cd ~/Documents/web_project
mkdir nepy_git
cd nepy_git
git clone https://PAT@github.com/copied_url jose
The command cd ~/Documents/web_project will take you to the folder web_project. Then a new directory called nepy_git is created using the command mkdir. After this, the command cd nepy_git will allow to access the recently created directory. Finally, the command git clone https://TAP@github.com/copied_url will clone the files from your remote repository (GitHub) from the branch master to your local repository (your computer). Note that PAT is your personal access token and copy_url is the link copied above.
In simple words, when you clone the GitHub repository, what you are doing is downloading all the files to your computer. This is equivalent to clicking on Download ZIP, as you can see in the figure above. If you open the nepy_git folder, you can see that a new folder called nepy (GitHub repository name) has been created containing all the files as in your remote repository.

Now, it is time to make the desired changes/improvements. For example, let's add a figure somewhere inside the folder nepy. For this, please type the following command in the terminal:
cp -a /path_to_source_file/file_name /path_to_destination_file/
It actually does not matter in which directory you are located now in the terminal, you can copy any file from one directory to another even if they differ from the current one.
Once the desired changes/improvements are done, it is time to save them. For this, the following commands should be written in the terminal. Please, remember that you are now located in the directory ~/Documents/web_project in the terminal.
cd nepy
git add .
git commit -m "message"
The command cd nepy will take you to the folder nepy. Then, what the command git add . does is to add all the changes/improvements done in the working directory to the staging area. In other words, it helps Git to understand you want to include updates to a particular file/folder.
As in any other work, for example, when you write a Word document and make changes on it, you automatically save them in order not to lose these changes. In git, the same logic is used. The command git commit -m "message" captures a snapshot of the project's currently staged changes. Please note that the "message" to commit can be any. It just helps you remind what changes/improvements were done.
Now, after having saved the respective changes/improvements, it is necessary to check if everything was done correctly. To do so, please type the following command in the terminal:
git status
If everything is correct, then the following message should appear in the terminal:

If you remember what was described above, in the GitHub repository, there are 3 branches: master, christian, and jose, and the changes/improvements done must be upgraded in the respective branch master), otherwise you may affect the changes/improvements done by the other members of the project.
In order to upgrade the remote repository (GitHub) in the respective branch, this branch should be also created in the local repository (your computer). Please notice from the figure above that you were working in the branch master. In nepy, I work in the branch jose. To create the branch jose, please type the following command in the terminal:
git checkout -b jose
Now, everything is ready to upgrade the respective changes/improvements in the GitHub repository. To do this, please type the following command in the terminal:
git push https://PAT@github.com/copied_url jose
Congratulations! You just took your first step in computer science. Not only did you learn about git, but you also learned how to work with full black screen (Ubuntu Linux terminal) using full commands. Keep going!
Views: 1
Related Articles


Notifications
Receive the new articles in your email
Other Articles

Python: Plotting data containing date format
joushe info

The nepy project: Investment, education, and cultural agility
stats con chris

The stock market. A complete explanation for beginners
stats con chris

Unburnable carbon
joushe info